Preserve Excess Fruit: Make Homemade Leather with No Artificials
Are you staring down a mountain of ripe berries from your garden, a bounty of apples from a recent orchard visit, or simply have extra fruit on hand nearing its prime? Before you let that precious produce go to waste, consider transforming it into a delicious, nutritious, and incredibly satisfying snack: homemade fruit leather. Forget the store-bought versions laden with artificial colors, flavors, and excessive sugars. Crafting your own fruit leather recipe allows you to control every ingredient, ensuring a pure, wholesome treat free from any nasties.
This comprehensive guide will walk you through the simple process of creating vibrant, naturally sweet fruit leather right in your own kitchen. It's an ideal way to preserve the seasonal flavors of your favorite fruits, providing a healthy, grab-and-go snack for the whole family.
Why Make Homemade Fruit Leather? A Healthy & Sustainable Choice
There's a special kind of satisfaction that comes from making the most of nature's bounty, and homemade fruit leather offers numerous benefits:
- No Artificial Ingredients: This is arguably the biggest draw. Commercial fruit leathers often contain corn syrup, artificial colors, and preservatives. When you make it yourself, your ingredient list is delightfully simple: fruit, and perhaps a squeeze of lemon juice.
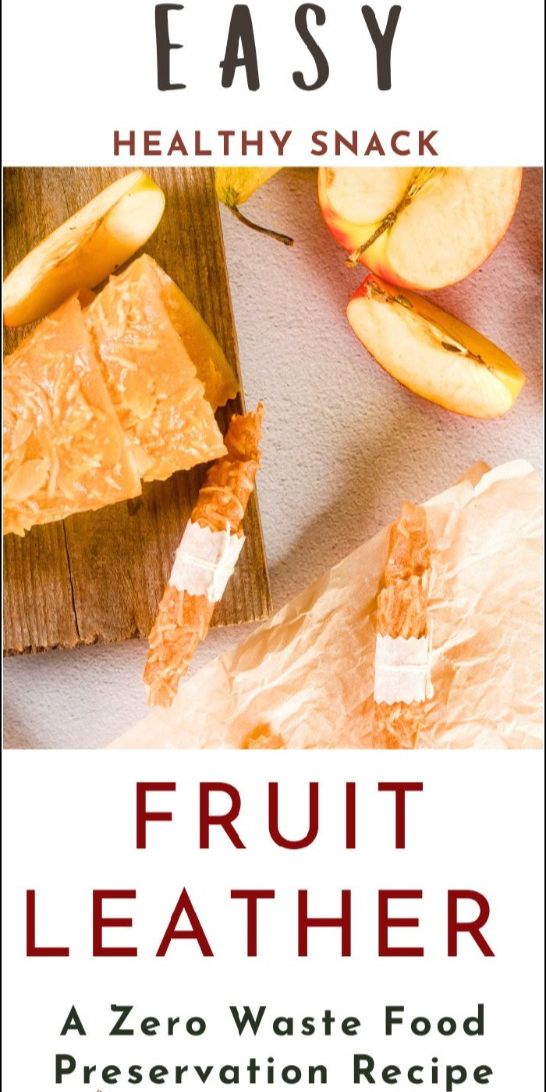
- Preserve Excess Produce: For avid gardeners or smart shoppers who buy in bulk, fruit leather is a fantastic solution for preventing food waste. Whether it's an influx of blueberries, an abundance of strawberries, or a heap of apples, turning them into leather extends their shelf life beautifully. This method stands proudly alongside canning, jamming, and freezing as a prime preservation technique.
- Healthy Snack Alternative: Rich in natural fruit sugars and fiber, homemade fruit leather is a far healthier option than many processed snacks. It's perfect for lunchboxes, post-workout fuel, or simply satisfying a sweet craving guilt-free.
- Nostalgic Appeal: Remember the joy of unwrapping those stretchy, flavorful fruit roll-ups as a child? Homemade fruit leather offers that same delightful experience, but with superior taste and health benefits. If you're looking to Recreate Childhood Fruit Roll-Ups: Simple Homemade Recipe, this is your starting point.
- Customizable Flavors: The versatility is endless! Experiment with single fruits or create unique blends. From sweet mango to tangy blackberry and apple, the choice is yours.
Essential Ingredients & Equipment for Your Fruit Leather Recipe
One of the best things about making fruit leather at home is that it requires no exotic ingredients or specialized equipment. You likely have most of what you need already!
Key Ingredients:
- Fruit of Choice: Approximately 400g (or about 1 pound) of fresh or frozen fruit. Berries (strawberries, blackberries, blueberries), apples, plums, pears, pineapple, and mango are excellent choices. Combining a sweet fruit with a slightly tart one (like apple or lemon juice) often yields the best balance.
- Lemon Juice (Optional but Recommended): A tablespoon or two can brighten flavors and acts as a natural preservative, helping to prevent browning and extending shelf life without any artificial additives.
- Sweetener (Optional): If your chosen fruit isn't very sweet, or you prefer a sweeter result, a touch of honey, maple syrup, or even a few dates can be blended in. Remember, the goal is often "no artificials," so opt for natural sweeteners.
Necessary Equipment:
- Saucepan: For gently cooking the fruit.
- Blender or Food Processor: To achieve a smooth purée. A stick blender works wonderfully for this.
- Fine-Mesh Sieve (Optional but Recommended): For the smoothest texture, especially if using fruits with tiny seeds or fibrous pulp.
- Baking Sheet: A standard baking sheet will do.
- Lining Material: A reusable silicone tray liner or parchment paper is essential to prevent sticking and ensure easy removal.
- Oven: You'll need an oven that can maintain a very low temperature, typically between 150-170°F (65-77°C). Alternatively, a food dehydrator can be used.
The Ultimate Fruit Leather Recipe: Step-by-Step Guide
This simple fruit leather recipe is incredibly forgiving and yields fantastic results. Follow these steps for a homemade snack that will impress!
Step 1: Prepare Your Fruit
Start by washing your chosen fruit thoroughly. Remove any stalks, cores, or tough skins. For fruits like apples, pears, or plums, core and cut them into chunks. If using frozen fruit, there's no need to thaw it completely beforehand; it will soften as it cooks.
Step 2: Gently Cook to Soften
Place your prepared fruit into a saucepan. You typically won't need to add any water, especially if using frozen fruit, as juices will release as they heat. Put the pan over a low heat. Cook gently, stirring occasionally, until the fruit softens and breaks down, releasing its juices. If using a lid, it can help trap steam and speed up the softening process, particularly for harder fruits like apples.
Step 3: Purée to Perfection
Remove the pan from the heat. Carefully transfer the softened fruit mixture to a blender or food processor. If using a stick blender, you can purée directly in the saucepan. Blend until the mixture is completely smooth. This is also the stage where you'd blend in optional lemon juice and any natural sweeteners.
Step 4: Refine the Texture (Optional but Recommended)
For an ultra-smooth, professional-quality fruit leather, press the purée through a fine-mesh sieve into a clean saucepan. Use the back of a spoon or a spatula to push as much pulp through as possible, leaving behind seeds and tough fibers. While optional, this step significantly improves the final texture, especially with seedy fruits like berries.
Step 5: Thicken for Faster Drying
Return the sieved purée to the clean saucepan and place it back on a low heat. Cook, stirring occasionally, allowing some of the moisture to evaporate. The purée will begin to thicken. You'll know it's ready when you can pull a spoon through the mixture and it leaves a clear patch on the bottom of the pan that fills in slowly. The more moisture you drive off at this stage, the shorter your drying time in the oven will be, saving you energy and time.
Step 6: Prepare for Drying
Preheat your oven to its absolute lowest setting, typically between 150-170°F (65-77°C). Line a baking sheet with a reusable silicone tray liner or parchment paper. Pour the thickened fruit purée onto the lined baking sheet. Spread it evenly into a thin layer, aiming for about 1/8 to 1/4 inch thick. The purée should be thick enough to appear opaque.
Step 7: The Drying Process
Carefully place the tray into the preheated oven. Dry for approximately 4-8 hours, depending on your oven, the thickness of your purée, and how much moisture was removed in Step 5. Check on it periodically. The fruit leather is done when the surface is no longer tacky to the touch and the edges lift easily. It should be pliable and leathery, not brittle or sticky. If it's still sticky, continue drying.
Step 8: Store and Enjoy
Once fully dried, remove the fruit leather from the oven and let it cool completely on the baking sheet. This cooling period helps it firm up further. Once cool, peel it off the liner. You can then use a pizza cutter or sharp knife to slice it into strips, squares, or roll it up for convenient storage. Store your homemade fruit leather in an airtight container at room temperature for up to a few weeks, or in the refrigerator for longer enjoyment.
Pro Tips for Perfect Fruit Leather Every Time
Elevate your fruit leather game with these expert insights:
- Fruit Combinations: Don't be afraid to mix and match! A blend of sweet and tart fruits (e.g., strawberry and apple, mango and a splash of lime) creates a more complex and balanced flavor profile.
- Sweetness Adjustment: Taste your purée before drying. If your fruit is particularly tart, adding a spoonful of natural sweetener like honey, maple syrup, or even a small amount of date paste can balance the flavors. Remember that drying concentrates sweetness, so a little goes a long way.
- Adding Spices: A pinch of cinnamon, nutmeg, or even vanilla extract can add another layer of flavor, especially to apple or pear leather.
- Even Thickness: Spreading the purée evenly is crucial for uniform drying. Thicker spots will take longer to dry, while thinner spots might become brittle.
- Oven Door Ajar: Some ovens benefit from having the door slightly ajar (a wooden spoon works well) during drying to allow moisture to escape more easily, preventing a steamy environment that hinders drying.
- Dehydrator Option: If you own a food dehydrator, it's an excellent alternative to the oven. Follow your dehydrator's instructions for fruit leather, typically drying at 135°F (57°C) for several hours. This method is often more energy-efficient for long drying times. For more detailed instructions on using your oven, check out our guide on How to Make Easy Homemade Fruit Leather in Your Oven.
- Checking for Doneness: The best test is touch. It should feel dry, non-tacky, and pliable, easily bending without cracking. If it still feels even slightly sticky, continue drying.
Making homemade fruit leather is a delightful journey into sustainable living and healthy eating. It's a testament to the fact that the most delicious and wholesome snacks often come from the simplest ingredients and a little bit of care. With this comprehensive fruit leather recipe, you're now equipped to transform any excess fruit into a beloved treat, free from artificials and full of natural goodness. Embrace the joy of preserving your harvest and savoring the pure taste of fruit!
